Thursday, August 26, 2010

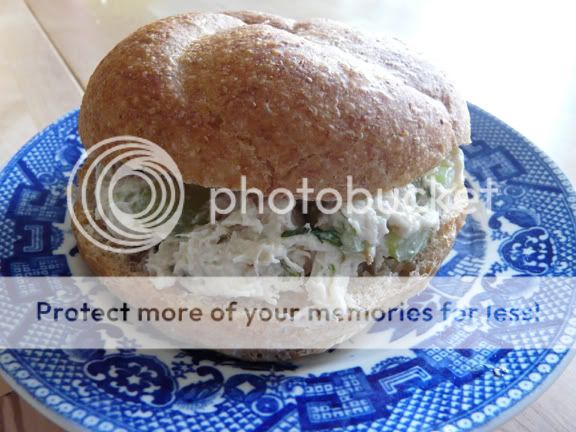
Chicken Salad with Tarragon


This is one of my favorite sandwiches courtesy of Ina Garten. It has a lot of memories for me: one of my Dad's favorite spices was tarragon. It reminded him of his years in France, since that is a french favorite. We found Ina's recipe and made it for a church luncheon where people loved it and we have both enjoyed it many times after that. Tarragon really adds a wonderful flavor that is second to none in this recipe.

It makes for moister, tastier chicken to cook bone-in, skin-on breasts in the oven and then cool and chop the chicken, however, I usually use what I have on hand which is of the boneless, skinless variety.

3 to 4 cooked and cooled chicken breasts
1/2 C mayonnaise
1 1/2 T chopped fresh tarragon leaves
1 C small-diced celery (2 stalks)
1/2 C to 1 C of green grapes, sliced in half
salt and pepper to taste

Cut chicken into a 3/4-inch dice. Place in a bowl; add the mayonnaise, tarragon leaves, celery, grapes, salt and pepper and toss well. Serve as a salad, or fill up your favorite rolls.

Tuesday, August 24, 2010

Jen's Lemon Bars

This a recipe I got from my good
friend and neighbor Jen.
They are simple and fantastic all at the same time.
The crust has a shortbread quality to it and the filling is super lemony!
This is my go-to recipe, since I always have the ingredients on hand
and they just hit the spot.

Jen's Lemon Bars:

Crust:
2 c. flour
1 c. butter
3/4 c. powdered sugar
1/2 t. salt

Preheat oven to 350 degrees.
Combine until a dough forms. Spread dough (I use my hands) into a sheet cake pan, the one I use is 13x15, but larger would work too.
Bake crust for 13-15 minutes.

Filling:
4 eggs
2 c. sugar
4 T. lemon juice
1 t. lemon extract (I added this because I like intense lemon flavor, it's optional)
1/2 t. baking powder
1/4 c. flour

Mix all ingredients for the filling together. When smooth, pour onto the hot crust and return to the oven for 20-25 minutes, until light brown and filling is set.

Sprinkle with powdered sugar if desired.

Bon Appetit!

Monday, August 23, 2010

Banana Bars with Cream Cheese Frosting

If your house is anything like mine - you've got lots of banana's in need of use.
I make banana bread on a regular basis, along with banana muffins and smoothies...ho hum.
This recipe is a breath of fresh air for my
freezer full of bananas!
Since it incorporates a fruit, I consider it healthier than say, chocolate cake.
Add some cream cheese frosting and it is over the top!

Banana Bars with Cream Cheese Frosting:

Banana Bars:
1/2 c. butter, softened
1 1/2 c. sugar
2 eggs
1 c. sour cream
2 t. vanilla
2 c. flour
1 t. baking soda
1/2 t. salt
1 c. or 4 ripe bananas

1 (16 oz) container cream cheese frosting, or homemade cream cheese frosting

Directions:
Preheat oven to 350 degrees. Grease a 10x15 inch jelly roll pan (mine was 13x17 and worked just fine.)
In a large bowl, cream the butter, sugar and eggs. Add the sour cream, bananas and vanilla. When incorporated, add the flour, baking soda and salt.
Spread evenly into the prepared pan.
Bake for 20-25 mins until a toothpick inserted into the center comes out clean. Allow bars to cool completely before frosting.
Cut and enjoy!

***Chef's Note: I am always amazed at how many people don't know that you can freeze your over-ripe bananas. They work perfectly for banana bread, muffins, smoothies and this cake! I won't lie...they are ugly, but you can thaw them in the microwave and use them in any recipe calling for ripe bananas:)

Bon Appetit!

Wednesday, August 18, 2010

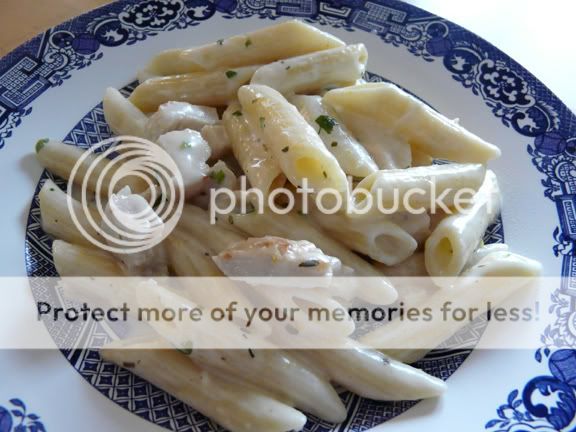
Chicken in Lemon Cream with Penne


I get hooked on one cookbook and everything I cook comes from it for a while. Yes, Giada again. There are no changes here except I added some cornstarch to thicken the sauce. It was not as much creamy, but rather runny before the miracle of the thickening power of cornstarch helped it out.
It has a lovely, fresh lemon flavor which tastes great on a warm summer night-- or any night. Herbes de Provence sounds fancy, but it can be picked up at any grocery store in the spice aisle.

1 lb penne pasta
3 T olive oil
2 boneless, skinless chicken breasts, diced into 1" cubes
1 tsp Herbes de Provence
pinch of salt, plus 1/2 tsp
pinch of pepper, plus 1/4 tsp
1 C chicken broth
2 C heavy cream
zest of one lemon
pinch of cayenne pepper
1/4 C fresh, flat-leaf parsley
1 T freshly squeezed lemon juice


Bring a large pot of salted water to a boil over high heat. Add the pasta and cook until tender, about 10 minutes. Drain.

Meanwhile, heat the oil in a skillet over med-high heat. Season the chicken with the Herbes de Provence and a pinch of salt and pepper. Cook until golden brown, about 5 minutes. Take the chicken out of the skillet and set aside. Pour off any excess oil from the pan. Add the chicken broth to the pan and cook over med-high heat, using a wooden spoon to scrape the brown bits off the bottom of the pan. Add the cream, lemon zest, and cayenne. Reduce the heat to medium low and simmer for about 10 minutes
. ( At this point, I dissolved about 1 T of cornstarch in a little cold water, or you could us chicken broth, and stirred it into the sauce.)

Add the pasta, chicken, 1/2 tsp salt, and 1/4 tsp pepper, chopped parsley, and lemon juice. Toss to coat the pasta and chicken with the sauce and serve. Bon Appetit!

Tuesday, August 17, 2010

Peanut Sesame Noodles

This is a recipe I've adapted from The Pioneer Woman.
She called her recipe Simple Sesame Noodles.
You may look it up if you'd like, the changes I made were subtle.
You could add chicken to this dish for a more "manly" meal,
but mine was working, so I didn't need to worry about his needs:)
I added 1 T. peanut butter to the sauce
and chopped peanuts as a garnish.
Both could be left out if you have nut allergies to consider.
On with it...
Peanut Sesame Noodles

12 oz, fluid thin noodles, cooked and drained (angel hair pasta is what I used)
1/4 c. soy sauce
2 T. sugar
3 garlic cloves, minced
2 T. rice vinegar
3 T. pure sesame oil
2 T. sweet chili sauce (this will still have some heat to it, despite the word "sweet")
6 T. canola oil
2 T. hot water
1 T. creamy peanut butter
4 green onions, sliced thin, to garnish
1/4 c. dry roasted peanuts to garnish

Whisk all ingredients (except noodles, green onions and peanut butter) together in a bowl. Taste and adjust ingredients as needed.
Pour sauce over hot noodles and toss to coat.
Sprinkle with green onions and peanuts, toss.

Bon Appetit!

Monday, August 16, 2010

Paula Deen's Gooey Butter Cake

Very few chef''s do "butter" better than Paula.
I knew that I would love this recipe before it was made.
I was not disappointed!
The recipe says to bake it for 40-50 mins, I checked it at 45 minutes
and wished I'd checked 5 minutes sooner.
Make sure the center is slightly giggly when you take it out:)

Paula Deen's Gooey Butter Cake:

Cake:
1 yellow or white cake mix, dry
1 egg
1 stick of butter, melted

Filling:
1 8oz package of cream cheese, softened
2 eggs
1 t. vanilla
1 stick of butter, melted
1 16 oz (1lb) box of powdered sugar

Preheat oven to 350 degrees.

Combine cake mix, egg and butter in a bowl. Mix well with an electric mixer. Pat the mixture into the bottom of a lightly greased 9x13 inch pan. Prepare filling.

In another large bowl, beat the cream cheese until smooth. Add the eggs, vanilla and butter. Beat together. Next, add the powdered sugar and mix well.

Spread filling over the cake batter and bake for 40-50 mins. Make sure not to over bake as the center should be a little gooey.

Bon Appetit!

Saturday, August 14, 2010

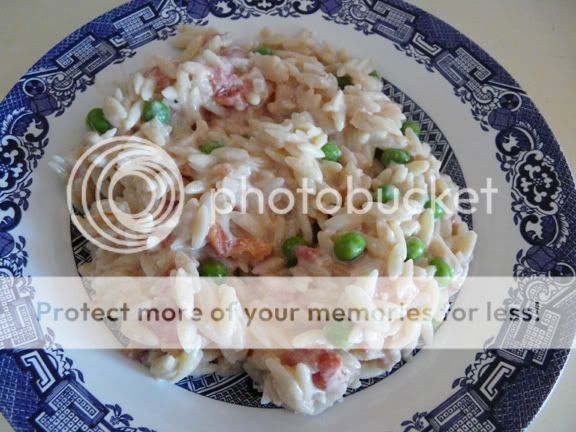
Creamy Orzo


I really love this recipe from Giada. The creaminess reminds me of a speedy risotto-- comfort on a plate. If you haven't cooked with Orzo before, it is a fun change from other pasta noodles.

1 lb orzo pasta
2 T olive oil
1 large shallot, finely chopped
1 garlic clove, minced
1 14.5 oz can of diced tomatoes, juices drained
1 1/4 C of whipping cream
1 C frozen peas, thawed

3/4 C freshly grated Parmesan
salt and pepper

Bring a heavy large pot of salted water to a boil over high heat. Add the orzo and cook until tender, but still firm to the bite, stirring often, about 8 minutes. Drain, reserving one cup of the cooking liquid.

Meanwhile, heat the oil in a frying pan over medium heat. Add the shallot and garlic, and saute until tender, about 2 minutes. Add the tomatoes and cook until they are tender, about 6 minutes. Stir in the cream and peas. Add the orzo and toss to coat. Remove the pan from the heat. Add the Parmesan to the pasta mixture, continue stirring until the sauce coats the pasta thickly, adding enough reserved cooking liquid to maintain a creamy consistency. Season with salt and pepper. Bon Appetit!


Wednesday, August 11, 2010

Paula Deen's Southern Peach Cobbler


Apparently great minds think alike: Tamara and I must have been channeling peaches! This is different from any cobbler I have made before-- maybe that's what makes it southern, who knows. This cobbler is definitely best made and eaten the same day--there is so much moisture in it from the peaches and juice and butter that it doesn't keep as well the next day. But since it is made in an 8X8 pan, it shouldn't be a problem to eat it in one day. I cut back some of the sugar and butter from the original recipe and it still tastes great.

4 C of peaches, sliced and peeled (I'm sure canned peaches would be fine too, but drain them)
3/4 C sugar
1/2 C water
Combine all together in saucepan. Stir. Bring to a boil and then simmer for 10 minutes. Remove from heat and set aside.

Preheat oven to 350 degrees. Put 6 T of butter in an 8X8 pan. Put in the oven to melt the butter.

In a bowl, mix together until smooth:
1 1/2 C flour
3 tsp baking powder (unless you are using self-rising flour then omit)
3/4 C sugar
1 1/2 C milk

Pour batter over the melted butter. Do not stir. Carefully spoon the peaches onto the batter, then gently pour the syrup over top. Sprinkle with cinnamon. The batter will rise to the top as it bakes. Bake for 30 to 45 minutes. Cool and serve with whipped cream or ice cream.


Tuesday, August 10, 2010

Peach Crisp...Cobbler...Crumble.

My intention was to take a captivating picture of this creation once it was plated up with a generous scoop of whipped cream...but literally, before I knew it - the pan was empty.
So, while this picture does nothing to visually inspire you to make it,
let me mention a couple of things.
1. I am the ONLY one in my family who enjoys peaches...
yet there was nothing left.
2. One-dish dessert.
3. I used...shhhh...canned peaches.
4. You likely have everything you need in your house to make this, right now.
'Nough said.


Peach Crisp...Cobbler...Crumble...whatever you want to call it.
3-15 oz cans of peaches with juice (you could easily use 4 cans or 2-27 oz cans)
1/4 c. brown sugar
1 t. cinnamon
1 t. nutmeg (I didn't have any so I used "apple pie spice")
1 t. cornstarch
1 yellow, white or vanilla cake mix, dry
1/2 c. butter, melted
Preheat oven to 350 degrees.
Pour peaches with juice in a 9x13 inch pan. Sprinkle with cinnamon, nutmeg and cornstarch. The sprinkle the brown sugar over the peaches.
Next, sprinkle the dry cake mix over the peaches to cover. Drizzle the melted butter on top of the cake mix.
Place in preheated oven and bake for 40-45 minutes or until the top is browned.
Let it cool then serve with whipping cream.
Bon Appetit!

Thursday, August 5, 2010

Creamy Cheesy Bruschetta


Like my grandfather before me, I love the clearance produce deals at the grocery store. Yesterday I found a package of 8 tomatoes for $1.50 and had to come home and do something with a few of them right away. These are really quick and tasty; a great thing to have with a salad in the summer for dinner.

Preheat oven to 350 degrees. Cut baguette into 3/4" pieces. Toast pieces lightly in the oven. Take out and set aside.

Topping:
2 medium tomatoes, diced into bite-sized pieces. I like to cut the tomato in half and squeeze out most of the seeds before I dice.
1/2 C (or more) of grated cheddar cheese
2 T of freshly grated Parmesan cheese
1/4 C mayonnaise
1 tsp dried oregano
1 tsp dried basil
1/2 tsp minced garlic
1 tsp balsamic vinegar
dash of pepper

Mix all ingredients together and spread on the baguette toasts. If you like, grate a little more Parmesan on the top, and then put back in the oven for around 6 minutes or so to warm the topping and melt the cheese. Eat warm. Bon Appetit!

Monday, August 2, 2010

Oreo and Fudge Ice Cream Cake

Unfortunate picture...
I was trying to take a picture, while 5 kids were nipping at our heals.
Fortunate recipe find!
Very yummy cake!
It is beyond easy and a nice change from regular cake.

Oreo and Fudge Ice Cream Cake:

1/2 c. hot fudge topping, room temp
1 - 80 oz tub of Cool Whip, divided
1 - 3 oz pkg. instant chocolate pudding
12 Oreo cookies, chopped or smashed:)
12 vanilla ice cream sandwiches, unwrapped

Pour hot fudge topping a medium size bowl, add 1 c. Cool Whip, mix until well blended. Add dry pudding mix. Mix for 2 minutes, then add chopped up cookies. Set aside.

Arrange 4 of the ice cream sandwiches, side by side on a 24 inch piece of aluminum foil. Top with half of the cookie mixture. Repeat layers. Top with remaining 4 ice cream sandwiches. Frost top and sides with remaining Cool whip. Bring up foil sides and loosely fold ends of package.
Freeze at least 4 hours before serving, preferably over night.

Here is the "how to video" if you'd like to see it done.

http://allrecipes.com/HowTo/Oreo--Fudge-Ice-Cream-Cake-Video/Details.aspx

Bon Appetit!

Oven Roasted Broccoli


I love the way oven roasted vegetables taste but for some reason, I have never tried Broccoli this way--until now. I am Addicted!! It is so good that if someone asked me if I wanted this broccoli or some chocolate, I would have to side with the broccoli.

Preheat the oven to 400 degrees.

Broccoli-- whatever amount, but into florets and then washed and patted dry.

Put the broccoli on a baking sheet and drizzle with olive oil. Then sprinkle with salt and pepper.

Cook for 15 minutes. You don't need to turn over-- just leave it. Some of the edges of the florets will be dark and crispy, but it tastes amazing.

Place on a plate or serving tray and grate some fresh Parmesan over top. I made it two nights in a row; once with the addition of some lemon zest which was really good, but I think I prefer just the Parmesan.

Saturday, July 31, 2010

Farfalle with Pesto, Chicken and Tomatoes

This is a great alternative to the usual pasta salad.
It incorporates
*pasta
*basil pesto
*chicken
*tomatoes
*feta cheese.
It could even be served as a main dish if you
paired it with a nice crusty bread.

Farfalle with Pesto, Chicken and Tomatoes:

1 lb. farfalle pasta, cooked according to directions

8 oz. pesto

1 1/2 c. chicken, cooked and shredded

5 roma tomatoes, diced

8 oz. feta cheese, I used the tomato and basil variety

1/4 - 1/2 c. oil - whatever kind you prefer, I used vegetable oil

salt and pepper to taste

Cook pasta, drain and cool by running under cold water. Add pesto, chicken, tomatoes and cheese. Stir well. Add enough oil to moisten the pasta. Refrigerate for 1 hour or until ready to serve. If the pasta seems dry, add a little more oil.

Bon Appetit!


Thursday, July 29, 2010

Simply the Best Chocolate & Butterscotch Chip Cookie

What more can I say?
These are the best.
They are soft and chewy
+
they are crisp and melt in your mouth.
Does it sound too good to be true?
Give them a try.


Simply the Best Chocolate & Butterscotch Chip Cookies!

4 1/2 c. flour
2 t. soda
1 c. butter, softened
1 c. butter flavored Crisco
1 1/2 c. brown sugar
1/2 c. white sugar
2 small boxes of instant vanilla pudding
4 eggs
2 t. vanilla
2 c. chocolate chips
2 c. butterscotch chips
2 c. walnuts, chopped & optional

Heat oven to 350 degrees.

In the large bowl of your mixer, place butter and shortening. Mix well. Add brown sugar, white sugar and pudding boxes. Mix until creamy. Add eggs and vanilla, combine. Add the flour slowly so you don't make a mess, add soda. Mix until everything is incorporated. Finally add the chips and nuts if you want.

Place spoonfuls on ungreased cookie sheets and bake for 10-12 minutes.

Bon Appetit!


Tuesday, July 27, 2010

Chile Verde

Chile Verde.
Yum.
Simple.
Versatile.

Chile Verde:

3-5 lb. pork - shoulder, butt or loin (I used a pork shoulder)\
5 small cans of green chilies, divided
2 garlic cloves
1 sweet onion
1 can tomato sauce
1 jalapeno, or more if you like it spicy
1 1/2 t. cumin
4 c. water
2 t. chicken bouillon
salt to taste

First start by cutting the pork into bite sized pieces. In a large pot heat vegetable oil. Add meat and saute until browned.

In a food processor, place 4 cans of green chilies, garlic, onion, tomato sauce, jalapeno and cumin. Blend until pureed together.

Add pureed mixture to pork, stir. Add water, chicken bouillon and the last can of green chilies.

Bring pot to a light boil, then turn down the temperature and simmer for 2-3 hours. Much of this timing will depend on which cut of meat you chose. Mine was done in about 2.5 hours - but a loin may take a little longer. Season with salt if needed.

Serve in warm tortillas with lots of toppings, cheese, tomato, onion, sour cream, cilantro and guacamole.

Bon Appetit!

Simply Brisket

Brisket.
Quite simply my favorite piece of beef.
If it's not done correctly it's tougher than a shoe,
but if you know how to cook brisket, it is the most flavorful
and versatile piece of meat, ever.
It's not difficult - but I think lots of people are scared of brisket
because it can be tough if not cooked properly.
I always serve my brisket with horseradish sauce.
It reminds me of Papa.
Here's how to do it with perfect results every time!


Simply Brisket:

5-6 lb. brisket - or bigger:)
1 head of garlic
1 1/2 t. onion powder
2 t. salt
pepper to taste
1 quart of beef stock

Preheat oven to 500 degrees or your broil option.

Using a paring knife and your fingers, stuff brisket all over with garlic cloves. Season brisket with onion powder, salt and pepper. Place brisket in a roasting pan and broil until top is browned. Turn over and do the other side.
Reduce oven temperature to 350 degrees. Make sure your brisket is fat-side-up. This will insure that as the brisket is cooking, the fat will baste the meat giving it lots of flavor. Add enough stock to come up 1 inch on the sides of the brisket.
Cover tightly with foil and bake for about 30 minutes per pound. This is where some guess work is involved. When the time is up, remove the brisket and stick a fork in it. If the meat comes apart easily, it is done. If not - stick that puppy back in the oven and let it go a bit longer.
When it is fork-tender, slice the meat AGAINST THE GRAIN. You can trim the fat off now or not. The juices that are left in the pan are PERFECT for gravy. Just make sure you skim the fat off of the juice.

***Note: Left over brisket is perfect for hot roast beef sandwiches or BBQ beef sandwiches. I actually look forward to the left-overs just as much as the first meal!

Monday, July 26, 2010

Chicken Spaghetti


I haven't cooked out of the Pioneer Woman's cookbook too much, but I do love it and Tamara inspired me to take it out of the bookcase. This is the PW recipe except I changed the chicken bit. The original recipe has a whole fryer chicken that you boil and then shred, and incorporates the stock the chicken has boiled in. I really don't like boiled chicken water--something about it just grosses me out. I know it's essentially the same thing, but I'd rather just open a box or can of stock. I had some leftover rotisserie chicken that I used instead. I like this recipe for how easy it is, especially if you have some leftover cooked chicken-- everything just gets mixed in the same bowl with the cooked spaghetti and then thrown in the oven for a quick dinner.

1 pound thin spaghetti, broken into 2" pieces (1/2 of a 900g pkg)
1 4oz jar of diced pimientos, drained
1/3 C diced onion
1/4 C diced green pepper (I used red)
2 cans cream of mushroom soup
2 1/2 C grated cheddar cheese
1 tsp Lawry's seasoned salt
black pepper to taste
dash of cayenne
2 C chicken stock
1 C (or more) of diced cooked chicken

Cook the spaghetti until tender and almost done. Drain and put in a large bowl. Add all the above ingredients except for 1/2 C of the cheese that will go on top. It seems a bit runny because of the amount of stock. It does end up absorbing it all and cooks up perfectly. Sprinkle the rest of the cheese on top and bake for 35-45 minutes at 350 degrees.

Saturday, July 24, 2010

PW's Sour Cream Pancakes

Oh My Gosh!!!
It's not very often I get excited about breakfast.
Dessert? Yes. Breakfast? Not so much.
These pancakes are not your run of the mill Krusteaz pancakes.
These are light, amazingly fluffy and beyond yummy.
They remind me of the Belgium Waffles we make, in that they
are also all of those things, light, fluffy and yummy.
The amount of sour cream to flour ratio, made me wonder how
in the world they would hold together, but they did and am I ever glad.
Since they are so delicate, flipping them takes some patience,
but once you take your first bite you will be so glad you tried them.

PW's Sour Cream Pancakes:

2 c. sour cream
3/4 c. flour
2 T. sugar
2 t. baking soda
1 t. salt
4 eggs
1 t. vanilla extract
butter

In a large mixing bowl combine eggs, vanilla and sour cream. Mix well. Add the salt, baking soda, sugar and flour. Mix well.

Place skillet over medium low heat, melt a tablespoon of butter. Pour the batter into the skillet about 1/4 c. at a time. Cook for about 1 1/2 minutes and then gently flip. Cook for another minute or so and remove to a plate. Repeat with remaining batter.
Top with butter and syrup or fruit and whipped cream.

Bon Appetit!

PW's Chocolate Sheet Cake

I recently bought a new cookbook -
I haven't bought one
in at least a year...my collection is out of control.
"The Pioneer Woman Cooks"
by Ree Drummond.
Jodie told me about her, we've both made many of the recipes
from her website,
and now her book is my new focus.
When I get a great new cookbook I obsess and make every recipe that
sounds new and tasty! I have to pace myself...
Last night I made this chocolate sheet cake. It is fantastic.
I love that you make the icing and put it on the cake while both are warm.
The top of the cake absorbed the icing and took it to
a whole new level of moist-ness.
All of the ingredients are things you likely have in your kitchen right now.
I love that.

PW's Chocolate Sheet Cake:

Cake:
2 cups flour
2 cups sugar
1/4 t. salt
1/2 c. buttermilk (if you don't have any I'll tell you how to make it)
2 large eggs
1 t. vanilla extract
1 t. baking soda
1 c. butter
4 heaping T. cocoa
1 c. water

Icing:
1 3/4 sticks of butter
4 heaping T. cocoa
6 T. milk
1 t. vanilla extract
1 lb. powdered sugar
1/2 c. finely chopped pecans

In a large bowl beat the eggs, buttermilk, baking soda and vanilla. Set aside. In a medium saucepan, melt the butter. Add cocoa. Whisk together to combine. Meanwhile bring 1 c. water to a boil. When the butter is melted pour the water in the pan. Allow to bubble for a minute then turn off the heat.
With the mixer going, slowly incorporate the warm chocolate mixture to the egg mixture. Do this slowly to tempur the eggs. When it is all combined add the sugar, salt and flour. Mix well.
Pour into a ungreased jelly roll pan, or rimmed baking sheet and bake for 20 minutes. (Mine actually took more like 26 minutes, but check with a toothpick to see when it is done.)
While the cake is baking make the icing.
Melt the butter in a saucepan over medium-low heat. Add cocoa and stir until smooth. Add milk and vanilla. Add powdered sugar. Stir together. You can add the chopped pecans now or you can sprinkle them on top of the icing after. (I have a child who dislikes nuts so I left him a corner that was nut-free.)
Immediately after removing the cake from the oven, pour the warm icing over the top of the cake. You'll want to avoid doing much spreading, so try to distribute it evenly as you pour.

***If you don't have buttermilk on hand this is what you can do. Add 1 T. white vinegar to just under 1 c. milk and stir.
BUT...buttermilk is SO versatile! And it is beyond inexpensive. Go buy some.

Bon Appetit!

Thursday, July 15, 2010

Vanilla Ice Cream without the Ice Cream Maker!

Creamy and light (in texture, not calories) homemade ice cream...
WITHOUT an ice cream maker?
YES!
A certain generous milk-man blessed me with an obscene amount
of heavy whipping cream recently.
My goal has been to find and make perfect homemade ice cream.
I've tried cooked custards. I've tried little packages of powder.
I've tried it all.
This one seemed too good to be true. It's not.
This recipe takes the burden off of the ice cream maker to whip enough air
into the ice cream to make it creamy and instead
uses the Kitchen Aid to do the job.
I've put my ice cream maker out to pasture. I suspect mine won't be lonely for long.


Magic Vanilla Ice Cream:

**makes 2 quarts

1 cup sweetened condensed milk
2 oz. white chocolate squares
2 T. quality vanilla
dash of salt
1/2 cup sour cream
2 1/2 cups heavy whipping cream

In a microwave safe bowl, melt the chocolate in the milk - for about 1 minute at 50% power. Stir. If chocolate isn't quite melted, heat for 20 second intervals, stirring after each time.
Cool. When milk/chocolate mixture is cooled add vanilla, salt and sour cream.

In a chilled bowl, beat the whipping cream to soft peaks - which takes about 2 minutes on medium high speed.

Mix 1/3 of the cream into the milk mixture. Once it is all combined, gently fold into the remaining cream, careful not to deflate.

Place mixture into an air tight container and freeze until firm about 6 hours or up to 2 weeks.

Bon Appetit!